

")


I’m Natalie Setareh, a makeup artist and educator. I’m also author of the book and host of the podcast under the same name, Be Your Own Makeup Artist. Today, I want to do a bit of a deep dive into the world of eyeshadow!
Do you have an eyeshadow palette that you don’t know how to use? Or know what all of the colors are for? Do you want to have a “perfect eyeshadow look” locked and loaded in your muscle memory? By the end of this post, you’ll have a better understanding of exactly how to create your perfect eye makeup look and apply eyeshadow like a pro!
If you would rather listen to this episode, you can find the Be Your Own Makeup Artist Podcast on all major podcast streaming services, or just click on one of the links below!
Listen iTunes | Spotify | Other
In this post, I hope to guide you through how we as pros apply eyeshadow. For a more comprehensive tutorial, check out my Learn Makeup in 5 Days course. If you find this all too overwhelming and need 1:1 support and someone to teach “eyeshadow” to you, you’ll find that inside of my Create Your Signature Look program.
Important note: some of the products linked in this post are affiliate links, which means I may earn a very small commission if you purchase any products using those links. These commissions help fuel me with coffee and motivation to continue serving you! Alternatively, if you like my content, go ahead and support me on Patreon.
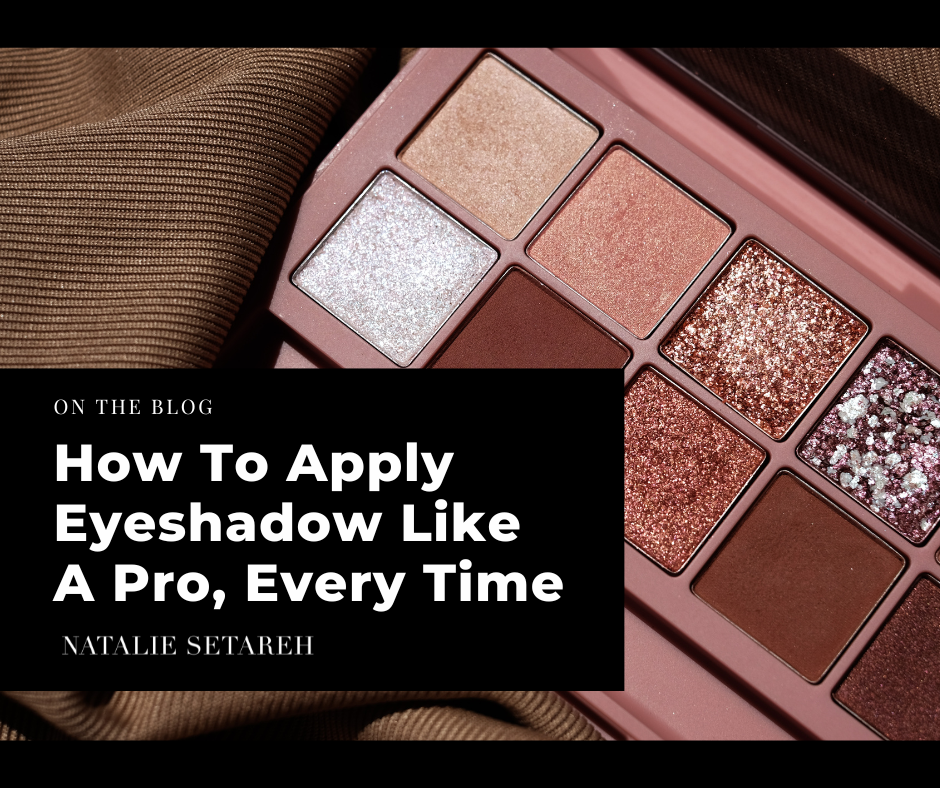
How To Apply Eyeshadow Like A Pro, Every Time
Okay, first things first.
If you want to apply eyeshadow like a pro, you need to think like a pro!
Which means that, before you apply any eyeshadow, you have to run through some very important steps:
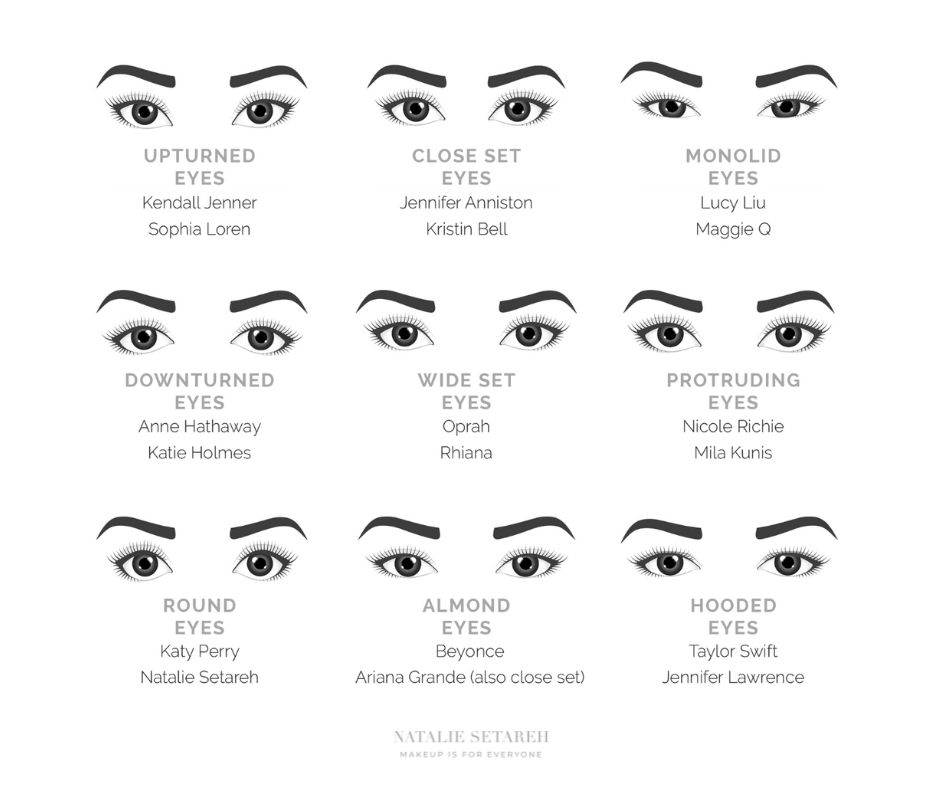
Step 1 – Determine Your Eye Shape
The first thing to keep in mind when determining your eye shape is that your eyes are sisters, not twins (just like most of our eyebrows).
My left eye is a little droopier and hooded than my right eye. My left eye looks perfect in eyeliner, but my right looks a little sad.
There are many different free articles out there to help you determine your eye shape. In my Learn Makeup in 5 Days course, I have an easy, yet “scientific” way to confidently determine your eye shape.
Step 2 – Analyze Your Eye Color
While yes, we need to make sure we wear makeup that matches and compliments our skin tone, there is room for so much creativity in what shades of eyeshadow to wear.
Now, you probably already know your eye color. But have you really sat down and analyzed your eye color to see what tones pop out?
For example, you can have blue eyes that have lots of grey or green, they are a cool blue eye.
You can have brown eyes that have more yellows and reds in it, that’s a warm blue.
Green eyes can also golden yellow or amber (warm) undertones or greys and blue (cool) undertones.
Inside of my Create Your Signature Look program, I do this for you! I create (and shop for) the exact tones that work for your eyes, to either enhance them or to make them pop. I also make sure they compliment your skin undertone and style.
Learn more about Create Your Signature Look here:

Because we all have such unique eye colors, it’s hard for me give out a list of the best eyeshadow colors for you to use. But here are a few resources that you can check out if you’re interested in diving deeper on this topic (and I highly suggest that you do if your goal is to create a flattering everyday makeup look that highlights your best features!)
Color Theory and Makeup with Terri Tomlinson Podcast Episode
Be Your Own Makeup Artist Book by Natalie Setareh
Step 3 – Determine Your Brow Shape
Just like we all have face shapes and lip shapes, we also all have brow shapes. Our unique brow shape (and what shape looks best on us) depends on your face shape, eye shape, and brow bone structure.
You’ll find a great diagram of the different face shapes and brow shapes in my book. You also find a more comprehensive guide on how to know where your brows should start, end, and where the arch is inside my book, Be Your Own Makeup Artist.
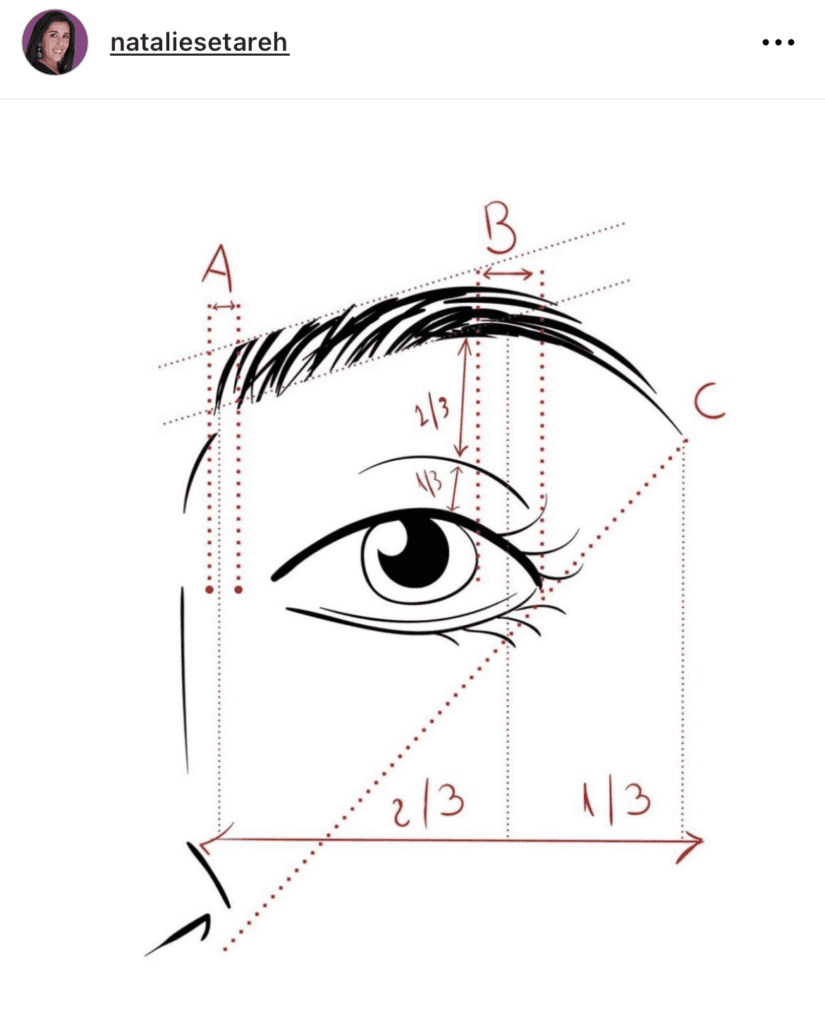
How to determine your brow shape?
A good place to start is just to find out where your brows begin. Take a skinny pencil (or a chopstick) and align it vertically with the inner corner of your eye and the outer corner of your nose.
To find where your brow should end, just keep the chopstick in the outer corner of your nose and line it up with the outer corner of your eye. Here’s a helpful diagram from my Instagram feed:
Step 4 – Consider the Occasion
Now that you’ve determined your eye shape, analyzed your eye color, and determined your brow shape, it’s time for you really understand the occasion for your eyeshadow.
What’s type of lighting are you going to be in?
Dim or warm lighting might call for a darker shade or a smoky eye.
Natural lighting during the day would be a few shades lighter or a more neutral shade.
Studio lighting or artificial lighting can go either way. But in this case, you’ll want to make sure you are wearing eyeshadow so that your eyes don’t fade into the camera or screen.
As you can see, there are number of different occasions and more that aren’t mentioned here. You’ll have to really think like a makeup artist so you can determine how bold your eyeshadow shades need to be (which we’ll get to in the next step) or if a lighter shade or shades of eyeshadow is better for the occasion.
Step 5 – Consider Your Preferences
I could sit here and give you all of the “pro tips” I know, but at the end of the day, the way you wear makeup should be a reflection of you. If you want to express yourself a certain way with your makeup, but all of the pros are telling you to do something else, do what you want to do! I am a firm believer that makeup is something that we should play with and have fun with.
Of course, if your goal is to rock an eyeshadow look with colors that compliment your skin tone and flatter your eye shape, you are welcome to follow the tips above and the tips that I outline in my book and in my course. But if you want to try some new things and see how you like them, by all means, play around! Experiment with your makeup and see what you like!
Bonus Tip – Gather All The Right Tools
You’ve got everything you need in terms of information and colors to apply your eyeshadow. Now it’s time to make sure you have all the right brushes and tools to bring your eyeshadow look to life.
The most important thing to remember is that your eyeshadow brushes need to be sized appropriately to your eye shape. And also, to the type of eye makeup you’ll be wearing.
There are so many different shapes and types of brushes, all of which is outlined in more detail in my makeup brush guide. You want to make sure you have a collection of the right brushes for you. That’s why I always advise against purchasing brush sets.
In general, you’ll want to use a smaller brush for more detail work, like eyeliner and smudging and a larger brush for larger areas like your lid and crease.
Now you’re probably starting to understand why makeup artists have so many makeup brushes! They need to be prepared for all the different and unique face, eye, lip, and brow shapes that come their way. You are also probably starting to realize why makeup artists charge a lot of money for their work. They all of these steps, seemingly simultaneously and in a short amount of time.
Again, you can learn more about the right brushes for you inside of my Makeup Brush Guide and of course, how to use them inside of my Learn Makeup in 5 Days course.
With enough practice and determination, you can apply eyeshadow like a pro, every time.
Once you have the right brushes, you’re ready to start applying your eye makeup. See you in the next step!!
Eyeshadow Step-By-Step Application Guide
Step 1: Eyeshadow Primer
Unlike face primers, I do like to use eyeshadow primer for occasions where I’m using a lot of colors, or doing a smokey eye, or having a really long day and I want my eyeshadow to stay in place (read my blog post, A Primer in Makeup Primer)
Tools: Your ring finger or an appropriately sized dome shaped synthetic brush
Applying Eyeshadow Primer
First of all, make sure your eyeshadow primer is suited to your eye skin type. You could have dry skin and oily lids, for example. In this case, you’ll want to use a mattifying or oil free eye primer. Conversely, if you have oily skin and dry eyes, you’ll want to use a silicone based eye primer or perhaps even your concealer.
Apply the primer on your entire eyelid, either with a synthetic brush or your index finger.
Then you’ll need to set your eyeshadow primer with your base color. Your base color is normally a lighter shade that blends in with your skin tone on your eye. This color needs to be matte (in other words, no sparkle or shine). The eye base is generally one of the lightest colors in your eyeshadow palette. Alternatively, you can set your primer with translucent powder.
Step 2: Contour your eyes
Tools: Grab your fluffy blending brush, sized accordingly, and get ready to contour.
With so many different colors to choose from, the easiest way to determine the right colors to contour with are by finding a matte eyeshadow that’s 2-3 shades darker than your skin tone.
This shade is often referred to your transition shade or your crease color, especially if you’re going with a more classic smokey eye. Please know that you can really use any color here but try to avoid sparkly and shimmery shades in the crease, especially if you have smaller eyes or lots of fine lines. Sparkle and shimmer can have the oppositive effect, sometimes.
Pro tip: Apply your eyelid color first (more in step 3 below). Then go in with your this crease color.
Matte Shades and Neutral Colors
In your eye shadow palette, identify the matte, ‘transition’ shades. That is a color that has no shimmer/shine, that is a few shades darker than your skin tone. Use a blending brush and work the product into the crease of your eye or make a crease, if that’s what you want. I also call the crease your eye socket. Remember when you are working with high quality shadows, a little bit of product goes a long way.
*Just* contouring my eyes with my eye base and a contour shade is one of my favorite ways to wear eye shadow.
Pro tip! Tap off any excess product before going in. Makeup sure to tap off excess product every time before you apply.
Step 3: Apply the Lid Color
Tools: Domed shaped brush
This is where you can have a lot of fun and let your personality shine. Apply whatever colors you selected based on your eye color and personal preferences. Want to use 10 different colors, go for it. I normally use one shimmer color all over + a pop of highlight in the corner of my eye. The transition shade or contour that I did from the previous step is either ok as is -or- I might intensify it after this lid color application.
Pro Tip: This is the color closest to your eye, so color theory really pays off here.
Non-Step: Eyeliner
Honestly, the application of eyeliners is an entire post in and of itself. I’m not going to spend a ton of time on eyeliner because this post is based on eyeshadow (duh!). Plus, when you apply your mascara to perfection, the need for eyeliner is reduced.
Now, if you want eyeliner, take a look at all those pencil eyeliners you have. Grab the darkest shade and line your tight line. Not only will this open your eyes and make them appear bigger and brighter (regardless of your eye shape), but it’s nearly impossible to mess up. Read: you won’t ruin your eyeshadow.
View this post on Instagram
Step 4: Apply Mascara
View this post on Instagram
It’s no secret how much I love mascara. This is one of the few products that I feel ‘naked’ without (not everyday, just some days). I often see people who don’t take enough time to really apply mascara. When you take time to coat each lash, from the middle to the outer lash, and the outer lash to the inner lash, then not only do you get your money’s worth with mascara, but the results are *chef’s kiss.*
Lashes define the eyes much like brows define the face.
Step 5: Eyebrows
Again, I don’t want to spend too much time on eyebrows because this is an eyeshadow post. I go into great detail into eyebrow and eyebrow grooming inside of my course. But make sure the proportions are right.
See a professional eyebrow groomer, whose work you really admire, and have them shape your eyebrows!
After your done with your eye makeup, you’ll want to “seal it in” to make sure everything stays in place. Grab a setting spray and lightly spritz. Here’s one of my favorite setting sprays:
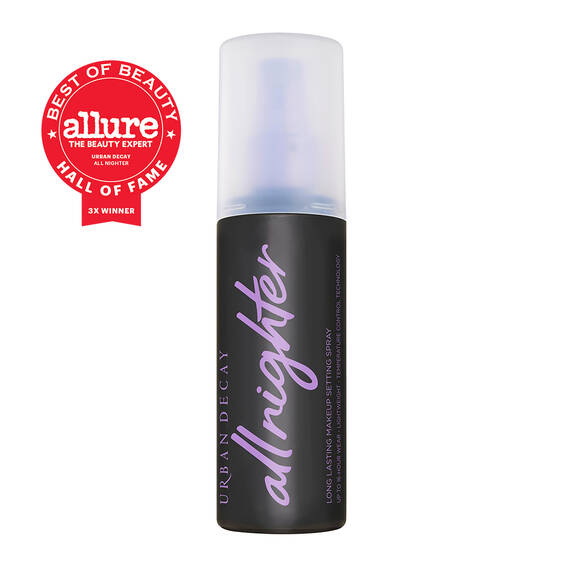
[image from urbandecay.com]
Closing Thoughts…
If you want to apply eyeshadow like a pro, the best thing you can do is map out your look first. This is a step that’s often skipped – and regrettably so. Most, if not all, brides book a bridal trial so they can preview their look for their big day, and make any changes before what is often the most photographed day of their lives. Why should our everyday or date night looks be any different? We can also put thought and intention into these looks as well. When we do, the outcome will undoubtedly be better than if we just “wing it” (no pun intended).
If you’re new to makeup or eyeshadow, I encourage you not to skip this step. Really map out and find eyeshadow looks like inspire you and that you feel would have similar effects on your eyes.
I have a really amazing exercise inside of my Learn Makeup In 5 Days course that really helps you hone in on your unique makeup style. And of course inside of Create Your Signature Look, I work with you 1:1 to clearly define what you love and help you shop for products and colors that work for you.
In closing, here are the things I want you to remember:
If you want your eyes to pop, use a color opposite the main color of your eye on the color wheel.
If you want a smokey eye, stick with either a darker version of your eye color or again, if you want to make a statement, find a complimentary color (the darkest shade) and use that as your base. Or of course you can go metallic with a color that compliments your skin tone. I have an amazing chart in my book that will help you determine your best highlighter/metallic shade.
If you’re going to opt for dark eyeshadow or smokey eye look, I recommend doing your eye makeup before your face makeup. This way, if there’s any fall out (which there always is), it’s easier to clean without disrupting your makeup.
View this post on Instagram
If you’re going to an everyday look or a natural look, you’ll want to grab those flesh tone colors. You can even use your blush and bronzer for these shades. You’ll still want to map out your natural look!
Beauty is about perception, not about make-up. I think the beginning of all beauty is knowing and liking oneself. You can't put on make-up, or dress yourself, or do you hair with any sort of fun or joy if you're doing it from a position of correction.
kevyn aucoin
